How to Draw A Watermelon. Nothing beats a slice of sweet watermelon on a hot summer day! A bite of juicy watermelon is refreshing any time of day, any day of the year.
Also, check our coloring pages and flowers.
Due to its distinct taste and smell, watermelon is the favorite fruit of many people of all ages.
Because of its special look and bright colors, many of our readers found the watermelon drawing very interesting.
This has created a huge demand for a free watermelon drawing tutorial. You asked for it, so we delivered.
That's why we've created a step-by-step guide on how to draw a watermelon, summarized in 9 quick and easy steps.
Also, each guide comes with an illustration that makes it much easier to follow each step individually. Have fun drawing a delicious watermelon.
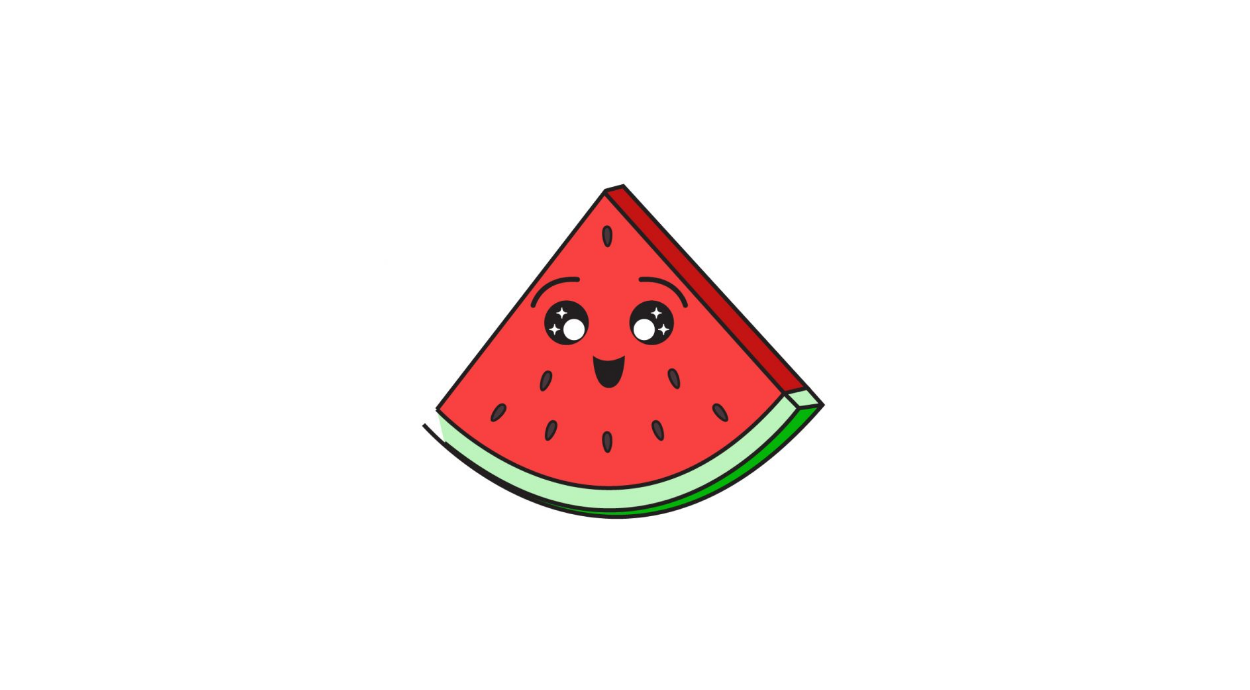
How to Draw A Watermelon
Step 1
First, draw a triangular shape with a round bottom. This forms the outline of the watermelon shape.
As you can see in the illustration, the outline of the watermelon is slightly off-center. There's a little more to the left, and that's okay!
This leaves enough space for the watermelon size that we will draw later.
Step 2
Expand the shape of the watermelon by creating the dimensions on the right. Just draw a diagonal line with a curved line at the bottom parallel to the outline we drew in the previous step.
Note that only the right side and bottom of the outline should be dimensioned, and the flat left side should be left out.
Step 3
Draw a curve near the edge of the curved line drawn earlier. Don't forget to add a diagonal square shape in the corner on the right side.
This creates the illusion of size, making the watermelon appear three-dimensional and lifelike!
Step 4
Add the seeds scattered over the entire surface of the watermelon. Seeds can be formed by drawing a tiny, standing oval shape with a pointed bottom edge.
Continue drawing the same shape onto the watermelon until you reach the desired pips. This means you can produce as many seeds as you like!
Ensure you leave enough space in the center for the watermelon's facial features, which we'll draw in the following steps.
Step 5
Draw a curved line on the left side of the middle part of the watermelon. This creates the arched left eyebrow.
Step 6
Repeat the previous step on the opposite side of the watermelon's "face." This creates the watermelon's right eyebrow, completing her curved eyebrows. Try to make your brows as even and aligned as possible.
Step 7
Draw a U-shaped curve at the bottom of the watermelon's "face." Next, draw a slightly curved line just above the U-shaped curve we just drew.
This completes the figure and completes the watermelon's big grin. At this point, the watermelon in your drawing should now look extremely happy!
Step 8
Draw a perfect circular shape just below the left eyebrow. This will outline the left eye of the watermelon.
Next, draw a small circle and two diamonds or stars in the eye. Next, shade the entire eye, leaving the figures inside unshaded on the outside.
This creates a dramatic "wink" effect, making the watermelon even more adorable!
Step 9
Repeat the previous step under the opposite eyebrow to create the right eye. After this step, the watermelon's left and right eyes should be complete!
And there you have it - an adorable piece of happy-looking watermelon! All that's missing is a touch of color to make it colorful! Imagine how beautiful this piece of art would look with bright colors!
Now that we have successfully drawn a watermelon, it's finally time for the most exciting part - coloring the drawing!
Take this opportunity to show off your artistic skills, especially your ability to combine different colors!
As we all know, watermelons have dark green skin and pink flesh inside. You can color the watermelon exactly as it looks or uses a unique color palette!
Your Watermelon Drawing is Finished!